时至今日,CentOS 都停服了,我也不再是那少年,这些折腾记录了我曾是个爱折腾的少年!
CentOS 8.x & Fedora 29+
虚拟机内使用 CentOS 8.x 和 Fedora 29+ 系统时遇到的一些问题。
修改网络配置
# CentOS 8.x
sudo vi /etc/sysconfig/network-scripts/ifcfg-enp0s8
TYPE=Ethernet
PROXY_METHOD=none
BROWSER_ONLY=no
BOOTPROTO=dhcp
DEFROUTE=yes
IPV4_FAILURE_FATAL=no
IPV6INIT=yes
IPV6_AUTOCONF=yes
IPV6_DEFROUTE=yes
IPV6_FAILURE_FATAL=no
IPV6_ADDR_GEN_MODE=stable-privacy
NAME=enp0s8
UUID=b1914547-de69-4974-93f3-9b8bef8dabc0
DEVICE=enp0s8
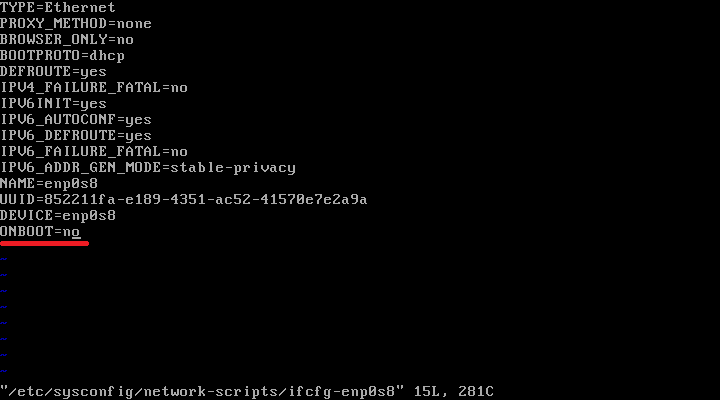
ONBOOT=yes将 ONBOOT=no 设置为 ONBOOT=yes,然后重启网络
sudo systemctl restart NetworkManager.service
# 或者
sudo systemctl stop NetworkManager.service
sudo systemctl start NetworkManager.service
# 或者
sudo nmcli networking off
sudo nmcli networking on
本地化设置
命令行内输入 locale 看到如下输出时,意味着系统语言环境没有设置
locale: Cannot set LC_CTYPE to default locale: No such file or directory
locale: Cannot set LC_MESSAGES to default locale: No such file or directory
locale: Cannot set LC_ALL to default locale: No such file or directory
LANG=zh_CN.UTF-8
LC_CTYPE="zh_CN.UTF-8"
LC_NUMERIC="zh_CN.UTF-8"
LC_TIME="zh_CN.UTF-8"
LC_COLLATE="zh_CN.UTF-8"
LC_MONETARY="zh_CN.UTF-8"
LC_MESSAGES="zh_CN.UTF-8"
LC_PAPER="zh_CN.UTF-8"
LC_NAME="zh_CN.UTF-8"
LC_ADDRESS="zh_CN.UTF-8"
LC_TELEPHONE="zh_CN.UTF-8"
LC_MEASUREMENT="zh_CN.UTF-8"
LC_IDENTIFICATION="zh_CN.UTF-8"
LC_ALL=
是中文环境,就安装中文语言包,如果是英文环境就安装英文语言包
sudo dnf install -y glibc-langpack-zh配置组账户权限
# 创建组 staff
groupadd staff

# 创建 docker 用户,并把它加入到 staff 组中
useradd -g staff -d /home/docker docker

# 给 staff 组管理员 root 权限
useradd -s /bin/bash -g staff -G root docker
usermod -G root docker
配置镜像源
Fedora 系统
# 加快下载速度
sudo sed -e 's!^metalink=!#metalink=!g' \
    -e 's!^#baseurl=!baseurl=!g' \
    -e 's!//download\.fedoraproject\.org/pub!//mirrors.tuna.tsinghua.edu.cn!g' \
    -e 's!http://mirrors\.tuna!https://mirrors.tuna!g' \
    -i /etc/yum.repos.d/epel.repo /etc/yum.repos.d/epel-testing.repo /etc/yum.repos.d/epel-modular.repo \
    /etc/yum.repos.d/epel-playground.repo

# 指定安装源
sudo sed -e 's|^metalink=|#metalink=|g' \
   -e 's|^#baseurl=http://download.fedoraproject.org/pub/fedora/linux|baseurl=https://mirrors.ustc.edu.cn/fedora|g' \
   -i /etc/yum.repos.d/fedora.repo \
   /etc/yum.repos.d/fedora-modular.repo \
   /etc/yum.repos.d/fedora-updates.repo \
   /etc/yum.repos.d/fedora-updates-modular.repo
安装软件包
# texinfo-tex openblas-devel pandoc
sudo dnf config-manager --set-enabled PowerTools
# R-devel
sudo dnf -y install epel-release
sudo dnf update
安装 MariaDB
# 从系统仓库安装开源版
sudo dnf install -y mariadb mariadb-devel mariadb-connector-odbc unixODBC-devel mariadb-server

# 启动 mysql 服务
sudo systemctl start mariadb.service
# 设置开机启动
sudo systemctl enable mariadb.service

# 先设置密码,然后登陆
sudo '/usr/bin/mysqladmin' -u root password 'cloud'
mysql -u root -h 127.0.0.1 -p
mysql -u root -p ‘cloud’
主宿机文件传输
# 测试链接
ssh xiangyun@192.168.56.5 -p 22
# 主机文件 pandoc-2.10.1-linux-amd64.tar.gz 放入虚拟机
scp -P 22 rstudio-server-rhel-1.3.1073-x86_64.rpm xiangyun@192.168.58.5:/home/xiangyun/
输入密码后即可传输,速度飞快
rstudio-server-rhel-1.3.1073-x86_64.rpm 100% 45MB 74.5MB/s 00:00系统默认软件
尚未安装其它任何软件的情况下,系统自带的软件包,每一个都是生产力工具,每一个都值得写一篇长文介绍如何使用,留着以后折腾吧!
| 工具 | 概况 | 版本 |
|---|---|---|
| vi | 文本编辑器 A minimal version of the VIM editor | 8.0.1763 |
| bash | The GNU Bourne Again shell | 4.4.19 |
| gawk | The GNU version of the AWK text processing utility | 4.2.1 |
| grep | Pattern matching utilities | 3.1 |
| sed | A GNU stream text editor | 4.5 |
| dnf | 软件包管理器 Package manager | 4.2.7 |
| openssh | An open source implementation of SSH protocol version 2 | 8.0p1 |
| openssl | Utilities from the general purpose cryptography library with TLS implementation | 1.1.1c |
| curl | A utility for getting files from remote servers (FTP, HTTP, and others) | 7.61.1 |
| iptables | Tools for managing Linux kernel packet filtering capabilities | 1.8.2 |
| firewalld | A firewall daemon with D-Bus interface providing a dynamic firewall | 0.7.0 |
| NetworkManager | Network connection manager and user applications | 1.20.0 |
| rsyslog | Enhanced system logging and kernel message trapping daemon | 8.37.0 |
| dbus | D-BUS message bus | 1.12.8 |
| systemd | System and Service Manager | 239 |
| gnupg2 | Utility for secure communication and data storage | 2.2.9 |
| gzip | The GNU data compression program | 1.9 |
| xz | LZMA compression utilities | 5.2.4 |
| crontab | 定时任务 Root crontab files used to schedule the execution of programs | 1.11 |
tree 树形浏览器
tree 文件系统树形浏览器
sudo yum install -y treetree ~/.fonts输出结果可以被 Markdown 语法接受
/home/xiangyun/.fonts/
└── winfonts
    ├── Arial_Bold_Italic.ttf
    ├── Arial_Bold.ttf
    ├── Arial_Italic.ttf
    ├── Arial.ttf
    ├── FangSong_GB2312.ttf
    ├── KaiTi_GB2312.ttf
    ├── SimHei.ttf
    ├── SimSun.ttc
    ├── Times_New_Roman_Bold_Italic.ttf
    ├── Times_New_Roman_Bold.ttf
    ├── Times_New_Roman_Italic.ttf
    └── Times_New_Roman.ttf
1 directory, 12 files安装 fish/zsh
# 提供 chsh 命令
sudo yum install -y util-linux-user
# 安装 fish
sudo yum install -y fish
# 安装 oh-my-fish
curl -L https://get.oh-my.fish | fish
# 安装使用 robbyrussell 主题
omf install robbyrussell
# 设置 fish 为默认 shell
chsh -s /usr/bin/fish
安装软件
sudo dnf install -y \
  calibre inkscape optipng ImageMagick ghostscript texinfo \
  texlive-pdfcrop texlive-dvisvgm texlive-dvips \
  texlive-dvipng texlive-ctex texlive-fandol texlive-xetex \
  texlive-framed texlive-titling \
  tex-preview epstool texlive-alegreya texlive-sourcecodepro
删除内核
# 查看已安装的内核
rpm -qa | grep kernel
# 删除旧内核
sudo yum remove kernel-3.10.0-693.el7.x86_64
Linux 工具箱
Linux 平台常用的工具
| Package | Homepage | Version |
|---|---|---|
| sed | https://www.gnu.org/software/sed/ | 4.4-2 |
| gawk | http://www.gnu.org/software/gawk/ | 1:4.1.4+dfsg-1build1 |
| grep | http://www.gnu.org/software/grep/ | 3.1-2 |
| perl | http://dev.perl.org/perl5/ | 5.26.1-6ubuntu0.2 |
| gnupg2 | https://www.gnupg.org/ | 2.2.4-1ubuntu1.1 |
| vim | https://vim.sourceforge.io/ | 2:8.0.1453-1ubuntu1 |
| zip | http://www.info-zip.org/Zip.html | 3.0-11build1 |
| curl | http://curl.haxx.se | 7.58.0-2ubuntu3.5 |
| make | http://www.gnu.org/software/make/ | 4.1-9.1ubuntu1 |
| firewalld | http://www.firewalld.org/ | 0.4.4.6-1 |
| ghostscript | https://www.ghostscript.com/ | 9.26~dfsg+0-0ubuntu0.18.04.1 |
| imagemagick | http://www.imagemagick.org/ | 8:6.9.7.4+dfsg-16ubuntu6.4 |
安装 tlmgr
下载解压 install-tl-unx.tar.gz
wget https://mirrors.tuna.tsinghua.edu.cn/CTAN/systems/texlive/tlnet/install-tl-unx.tar.gz
tar -xzf install-tl-unx.tar.gz
安装
sudo ./install-tl-20181217/install-tl注意选择最小安装,即只安装包管理器 tlmgr (大约6M)
======================> TeX Live installation procedure <=====================

======>   Letters/digits in <angle brackets> indicate   <=======
======>   menu items for actions or customizations      <=======

 Detected platform: GNU/Linux on x86_64

 <B> set binary platforms: 1 out of 17

 <S> set installation scheme: scheme-infraonly

 <C> set installation collections:
     0 collections out of 41, disk space required: 6 MB

 <D> set directories:
   TEXDIR (the main TeX directory):
     /usr/local/texlive/2018
   TEXMFLOCAL (directory for site-wide local files):
     /usr/local/texlive/texmf-local
   TEXMFSYSVAR (directory for variable and automatically generated data):
     /usr/local/texlive/2018/texmf-var
   TEXMFSYSCONFIG (directory for local config):
     /usr/local/texlive/2018/texmf-config
   TEXMFVAR (personal directory for variable and automatically generated data):
     ~/.texlive2018/texmf-var
   TEXMFCONFIG (personal directory for local config):
     ~/.texlive2018/texmf-config
   TEXMFHOME (directory for user-specific files):
     ~/texmf

 <O> options:
   [ ] use letter size instead of A4 by default
   [X] allow execution of restricted list of programs via \write18
   [X] create all format files
   [X] install macro/font doc tree
   [X] install macro/font source tree
   [ ] create symlinks to standard directories

 <V> set up for portable installation

Actions:
 <I> start installation to hard disk
 <P> save installation profile to 'texlive.profile' and exit
 <H> help
 <Q> quit

Enter command: I
Installing to: /usr/local/texlive/2018
Installing [1/7, time/total: ??:??/??:??]: hyphen-base [22k]
Installing [2/7, time/total: 00:00/00:00]: kpathsea [1149k]
Installing [3/7, time/total: 00:01/00:01]: kpathsea.x86_64-linux [47k]
Installing [4/7, time/total: 00:01/00:01]: tetex [583k]
Installing [5/7, time/total: 00:01/00:01]: tetex.x86_64-linux [1k]
Installing [6/7, time/total: 00:01/00:01]: texlive.infra [394k]
Installing [7/7, time/total: 00:02/00:02]: texlive.infra.x86_64-linux [146k]
Time used for installing the packages: 00:02
running mktexlsr /usr/local/texlive/2018/texmf-dist ...
mktexlsr: Updating /usr/local/texlive/2018/texmf-dist/ls-R...
mktexlsr: Done.
writing fmtutil.cnf to /usr/local/texlive/2018/texmf-dist/web2c/fmtutil.cnf
writing updmap.cfg to /usr/local/texlive/2018/texmf-dist/web2c/updmap.cfg
writing language.dat to /usr/local/texlive/2018/texmf-var/tex/generic/config/language.dat
writing language.def to /usr/local/texlive/2018/texmf-var/tex/generic/config/language.def
writing language.dat.lua to /usr/local/texlive/2018/texmf-var/tex/generic/config/language.dat.lua
running mktexlsr /usr/local/texlive/2018/texmf-var /usr/local/texlive/2018/texmf-config /usr/local/texlive/2018/texmf-dist ...
mktexlsr: Updating /usr/local/texlive/2018/texmf-config/ls-R...
mktexlsr: Updating /usr/local/texlive/2018/texmf-dist/ls-R...
mktexlsr: Updating /usr/local/texlive/2018/texmf-var/ls-R...
mktexlsr: Done.
running updmap-sys --nohash ...done
re-running mktexlsr /usr/local/texlive/2018/texmf-var /usr/local/texlive/2018/texmf-config ...
mktexlsr: Updating /usr/local/texlive/2018/texmf-config/ls-R...
mktexlsr: Updating /usr/local/texlive/2018/texmf-var/ls-R...
mktexlsr: Done.
pre-generating all format files, be patient...
running fmtutil-sys --no-error-if-no-engine=luajittex,mfluajit --no-strict --all ...done
running package-specific postactions
finished with package-specific postactions


Welcome to TeX Live!


See /usr/local/texlive/2018/index.html for links to documentation.
The TeX Live web site (http://tug.org/texlive/) contains any updates and
corrections. TeX Live is a joint project of the TeX user groups around the
world; please consider supporting it by joining the group best for you. The
list of groups is available on the web at http://tug.org/usergroups.html.


Add /usr/local/texlive/2018/texmf-dist/doc/man to MANPATH.
Add /usr/local/texlive/2018/texmf-dist/doc/info to INFOPATH.
Most importantly, add /usr/local/texlive/2018/bin/x86_64-linux
to your PATH for current and future sessions.
Logfile: /usr/local/texlive/2018/install-tl.log
在 .zshrc 或者 .bashrc 文件中添加路径
# TeXLive
PATH="/usr/local/texlive/2018/bin/x86_64-linux:$PATH"
export PATH

export MANPATH=${MANPATH}:/usr/local/texlive/2018/texmf-dist/doc/man
export INFOPATH=${INFOPATH}:/usr/local/texlive/2018/texmf-dist/doc/info
此时 tlmgr 可以在终端中工作了
tlmgr search --file --global upquote.stytlmgr: package repository http://mirrors.tuna.tsinghua.edu.cn/CTAN/systems/texlive/tlnet (verified)
upquote:
texmf-dist/tex/latex/upquote/upquote.styRStudio Server 相关
安装 RStudio Server
curl -fLo rstudio-server-rhel-1.3.1073-x86_64.rpm https://download2.rstudio.org/server/centos8/x86_64/rstudio-server-rhel-1.3.1073-x86_64.rpm

gpg --keyserver keys.gnupg.net --recv-keys 3F32EE77E331692F
gpg --export --armor 3F32EE77E331692F > rstudio-signing.key
sudo rpm --import rstudio-signing.key
rpm -K rstudio-server-rhel-1.3.1073-x86_64.rpm

sudo dnf install -y rstudio-server-rhel-1.3.1073-x86_64.rpm
输出如下表示验证成功
rstudio-server-rhel-1.3.1073-x86_64.rpm: digests signatures 确定更新 Pandoc 版本
替换掉 RStudio Server 自带的低版本,RStudio 1.3 自带 Pandoc 2.7.3
tar -xzf pandoc-2.10.1-linux-amd64.tar.gz
sudo cp pandoc-2.10.1/bin/* /usr/lib/rstudio-server/bin/pandoc/
echo "PATH=/usr/local/lib/rstudio-server/bin/pandoc:$PATH; export PATH" | tee -a ~/.bashrc
配置 R 环境
# 查看 R-devel 依赖
sudo dnf builddep R-devel
# 安装 R 及其依赖
dnf install -y R git R-littler R-littler-examples \
   openssl-devel libssh2-devel libgit2-devel \
   libxml2-devel libcurl-devel
# 快捷方式
ln -s /usr/lib64/R/library/littler/examples/install.r /usr/bin/install.r
ln -s /usr/lib64/R/library/littler/examples/install2.r /usr/bin/install2.r
ln -s /usr/lib64/R/library/littler/examples/installGithub.r /usr/bin/installGithub.r
ln -s /usr/lib64/R/library/littler/examples/testInstalled.r /usr/bin/testInstalled.r

# 配置 R 英文环境
echo "LANG=en_US.UTF-8" >> /usr/lib64/R/etc/Renviron.site
# 配置系统英文环境
echo "export LC_ALL=en_US.UTF-8"  >> /etc/profile
echo "export LANG=en_US.UTF-8"  >> /etc/profile

# R 配置文件
sudo touch /usr/lib64/R/etc/Rprofile.site
sudo mkdir -p /usr/lib64/R/site-library
sudo chown -R $(whoami):$(whoami) /usr/lib64/R/library /usr/share/doc /usr/lib64/R/site-library /usr/lib64/R/etc/Rprofile.site

# https://github.com/r-lib/devtools/issues/2084
echo ".libPaths(c('/usr/lib64/R/site-library','/usr/lib64/R/library'))" | tee -a  /usr/lib64/R/etc/Rprofile.site

Rscript -e 'x <- file.path(R.home("doc"), "html"); if (!file.exists(x)) {dir.create(x, recursive=TRUE); file.copy(system.file("html/R.css", package="stats"), x)}'
# CRAN 镜像地址
echo "options(repos = c(CRAN = 'https://mirrors.tuna.tsinghua.edu.cn/CRAN'), download.file.method = 'libcurl')" | tee -a  /usr/lib64/R/etc/Rprofile.site
编辑安全策略
在 CentOS 8.x 上安装 RStudio Server 时,遇到如下错误,需要编辑策略 Security-Enhanced Linux (访问控制安全策略机制)
 ERROR system error 13 (Permission denied); OCCURRED AT: rstudio::core::Error

 rstudio::core::system::launchChildProcess(std::__cxx11::string, std::__cxx11::string, rstudio::core::system::ProcessConfig, rstudio::core::system::ProcessConfigFilter, PidType*)

 /var/lib/jenkins/workspace/IDE/open-source-pipeline/v1.2-patch/src/cpp/core/system/PosixSystem.cpp:2152;

 LOGGED FROM: rstudio::core::Error rstudio::core::system::launchChildProcess(std::__cxx11::string, std::__cxx11::string, rstudio::core::system::ProcessConfigFilter, PidType*)

 /var/lib/jenkins/workspace/IDE/open-source-pipeline/v1.2-patch/src/cpp/core/system/PosixSystem.cpp:2153
运行命令 sestatus 查看情况,修改策略配置文件
sudo vi /etc/sysconfig/selinux将 SELinux=enforcing 改为 SELinux=disabled,改完之后,重启,运行命令 sestatus,看是否生效
详见解决办法 https://community.rstudio.com/t/rserver-1692-error-system-error-13-permission-denied/46972/10
配置防火墙
开辟网络访问端口,比如 8282,准备分配给 RStudio Server
sudo firewall-cmd --zone=public --add-port=8282/tcp --permanent
sudo firewall-cmd --reload
修改默认配置
sudo chown -R $(whoami):$(whoami) /etc/rstudio/rserver.conf /etc/rstudio/rsession.conf
# 默认的 R 路径 /usr/bin/R
echo "rsession-which-r=/usr/bin/R" >> /etc/rstudio/rserver.conf
echo "www-port=8282" >> /etc/rstudio/rserver.conf
echo "r-cran-repos=https://mirrors.tuna.tsinghua.edu.cn/CRAN/" >> /etc/rstudio/rsession.conf

# 重启 rstudio-server 服务
sudo rstudio-server restart
然后就可以访问 http://192.168.58.5:8282
系统安装
安装 Fedora 29, CentOS 7, OpenSUSE 15, Ubuntu 18.04
安装 Fedora 29
开机进入安装界面后,首先选择安装过程中使用的语言,这里选择英语
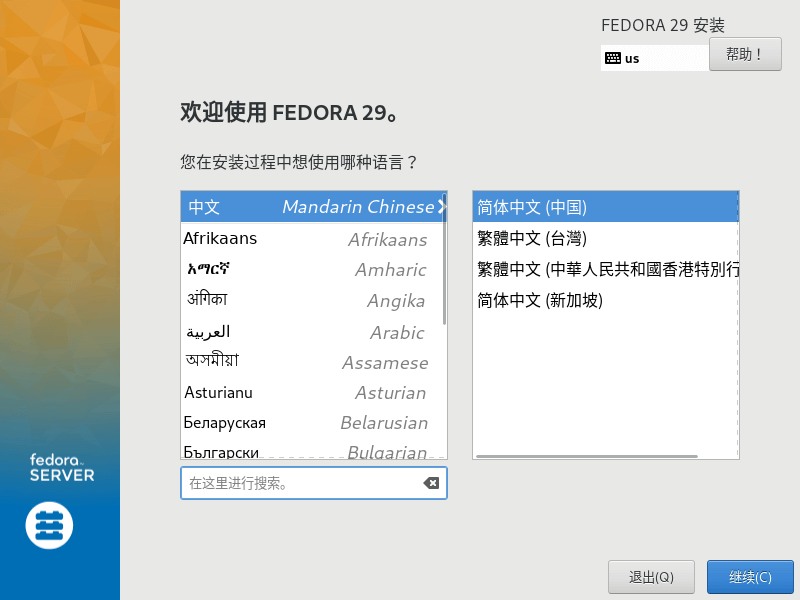
选择系统语言
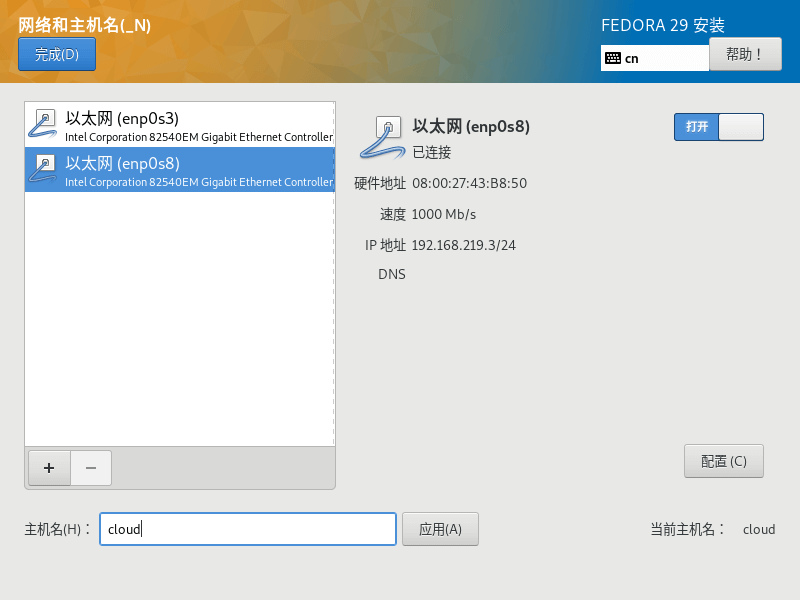
启用网络连接
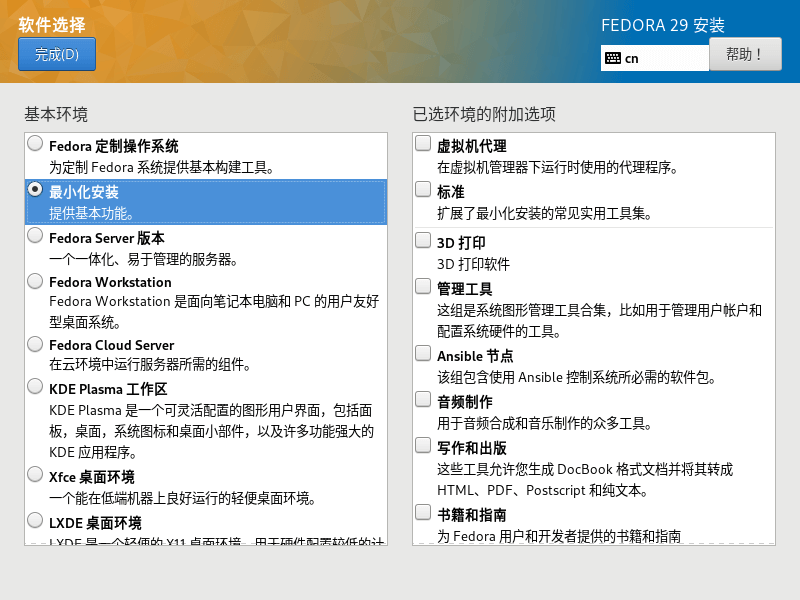
选择最小安装
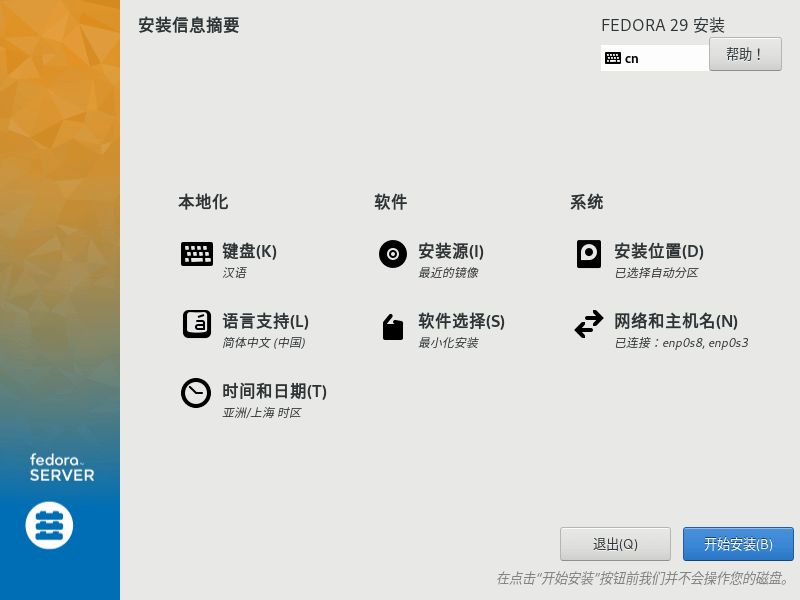
完成各项配置
等待安装直到完成
当我们往 Linux 系统输入第一个含有管理员权限的命令后,会提示如下一段话
[xiangyun@localhost ~]$ sudo dnf update

我们信任您已经从系统管理员那里了解了日常注意事项。
总结起来无外乎这三点:

    #1) 尊重别人的隐私。
    #2) 输入前要先考虑(后果和风险)。
    #3) 权力越大,责任越大。

[sudo] xiangyun 的密码:
安装 CentOS 7
填写在线安装的网络地址 https://mirrors.ustc.edu.cn/centos/8/BaseOS/x86_64/os/
CentOS 8 源帮助 https://mirrors.ustc.edu.cn/help/centos.html
sudo mv /etc/yum.repos.d/CentOS-Base.repo /etc/yum.repos.d/CentOS-Base.repo.backup
touch CentOS-Base.repo
vi CentOS-Base.repo
sudo cp CentOS-Base.repo /etc/yum.repos.d/
sudo yum makecache
配置网络后,重启网络
sudo nmcli c reload
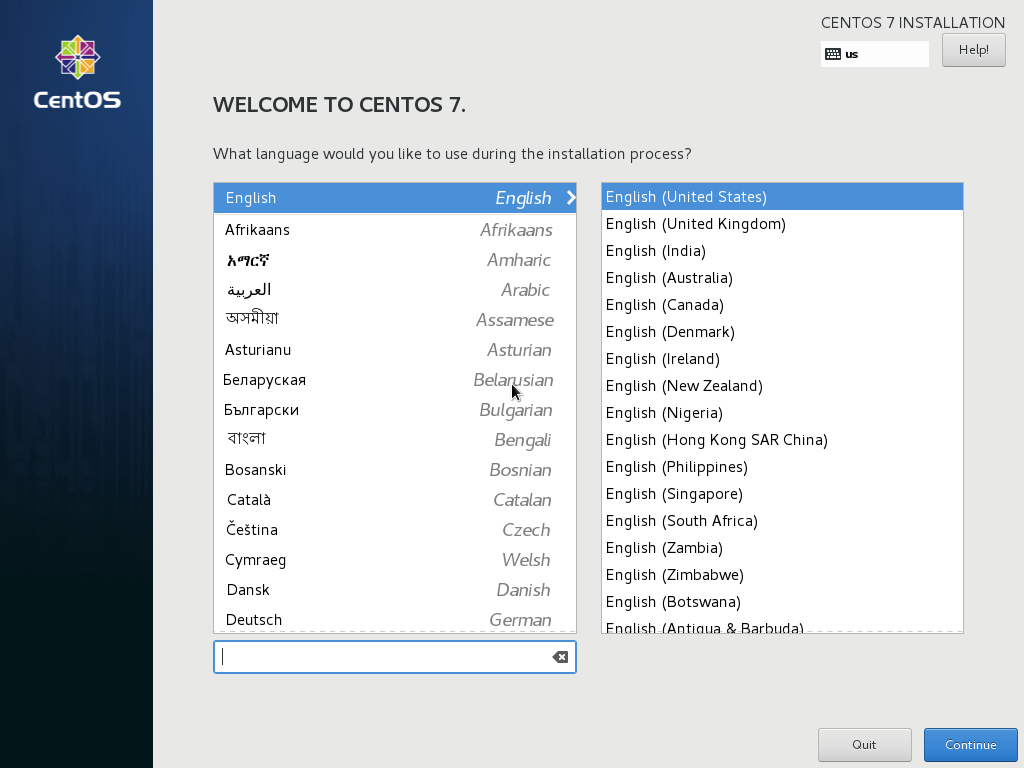
选择界面语言
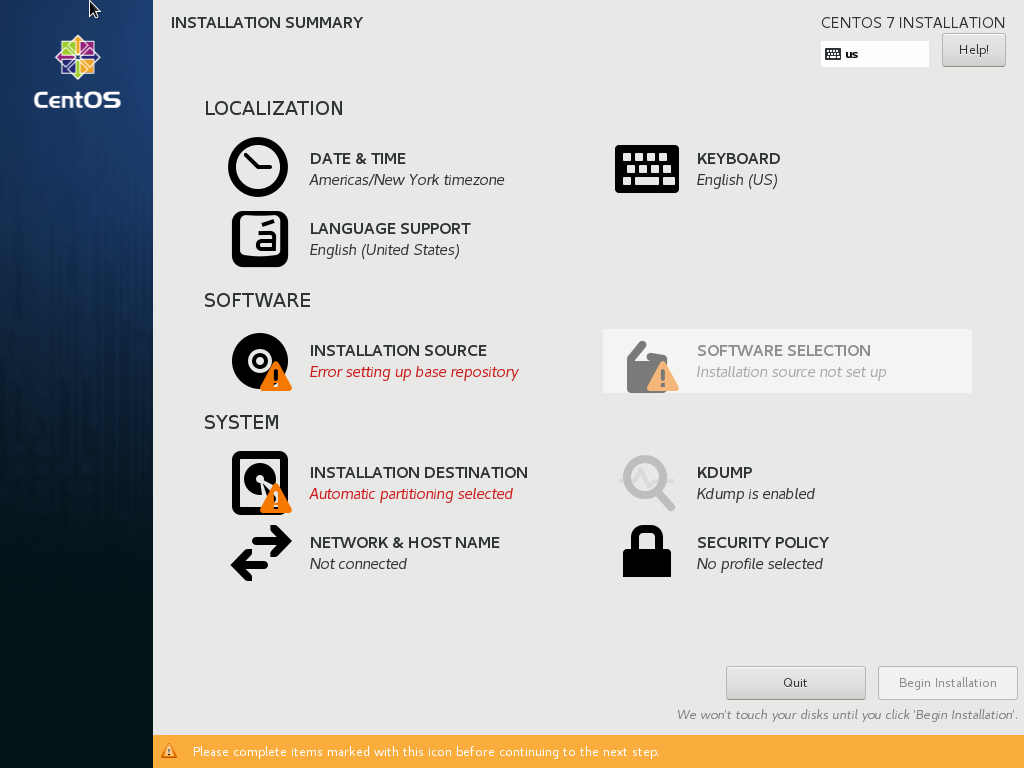
可以看到还有警告提示,需要配置网络连接、远程镜像位置、系统安装位置
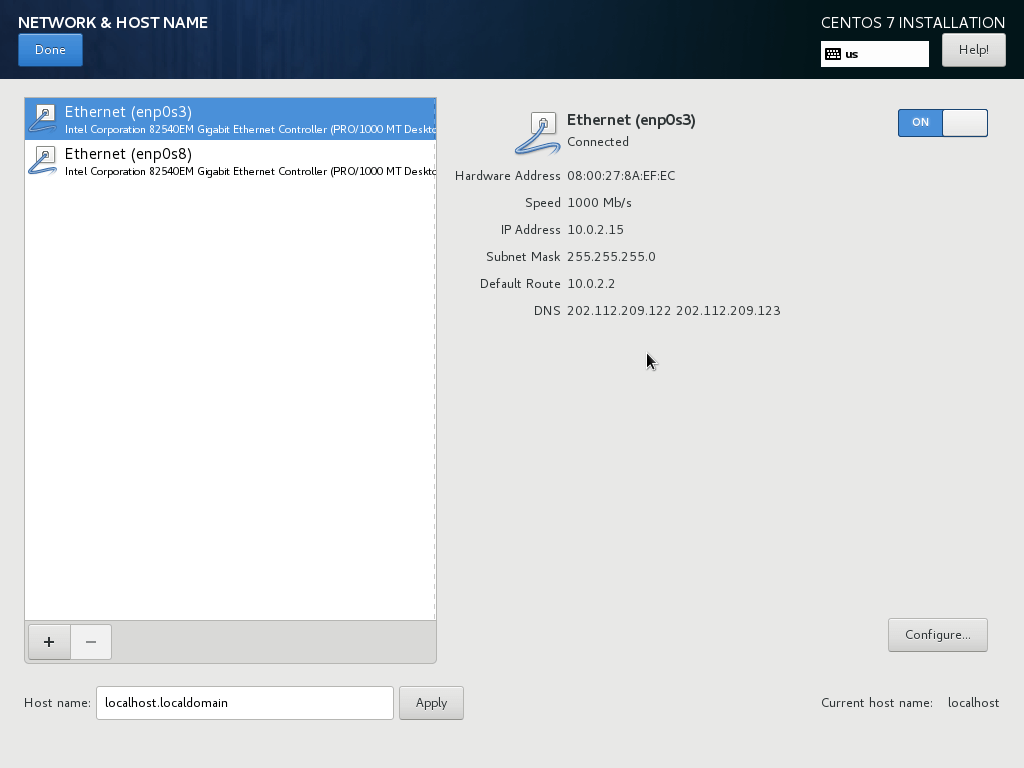
网络设置
默认情况下 enpOs3 没有启用
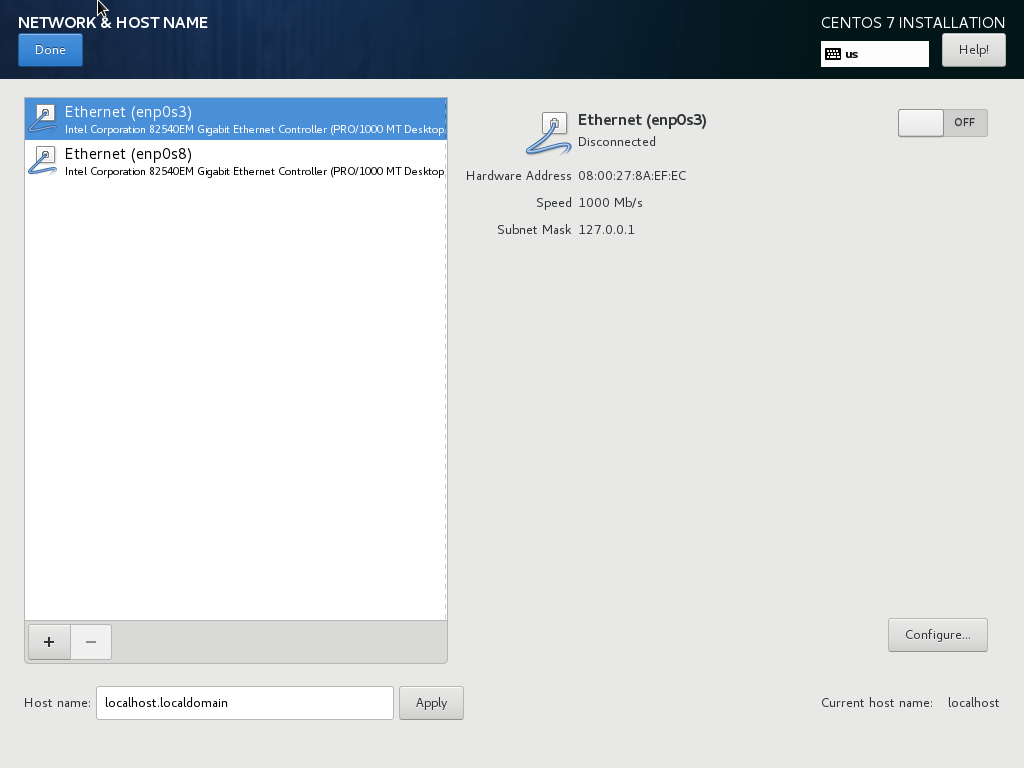
我们把它开启
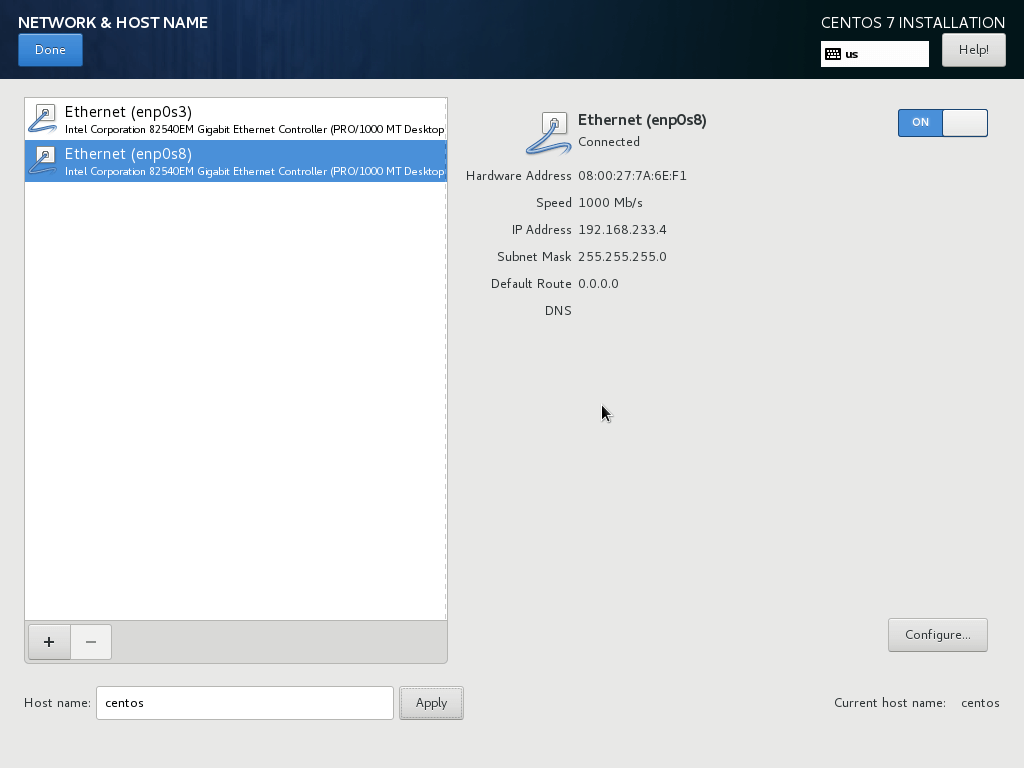
类似地,把 enpOs8 也开启
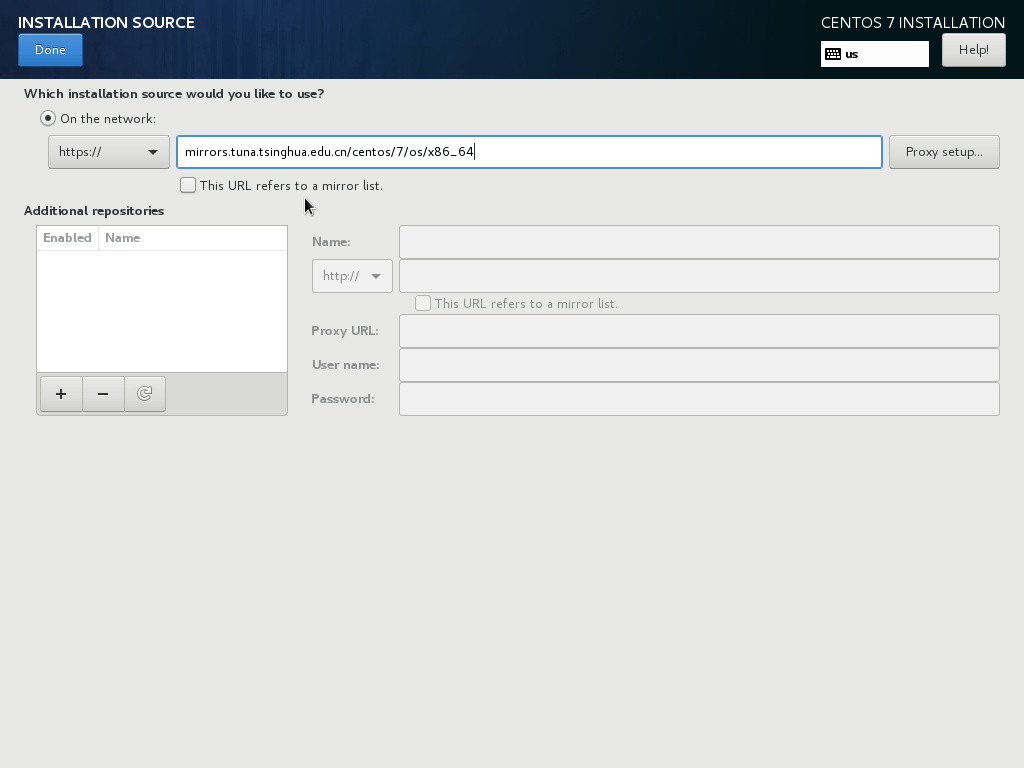
此时远程镜像位置还没有配置,选择就近的系统安装源,如清华
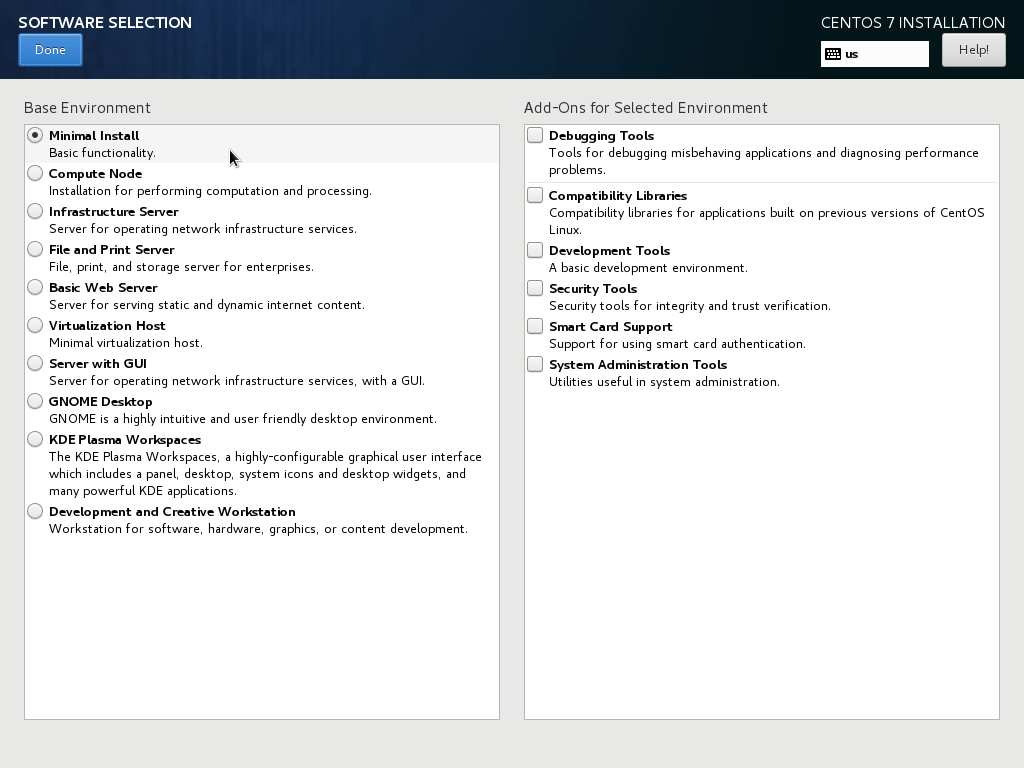
选择最小安装
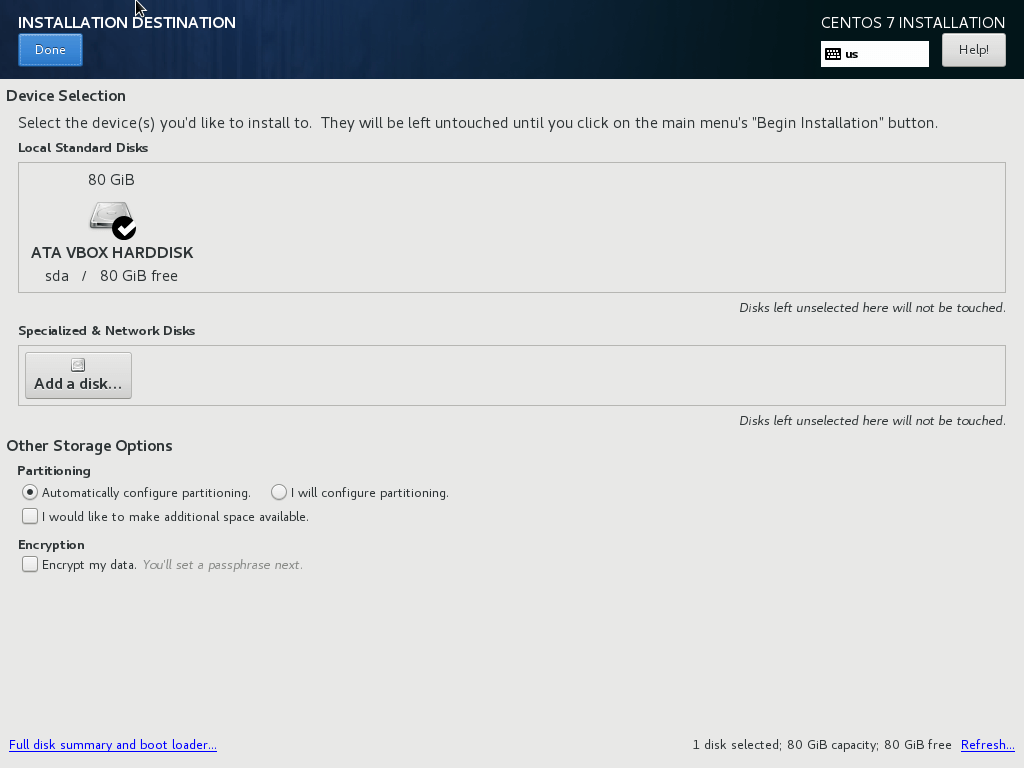
选择安装位置
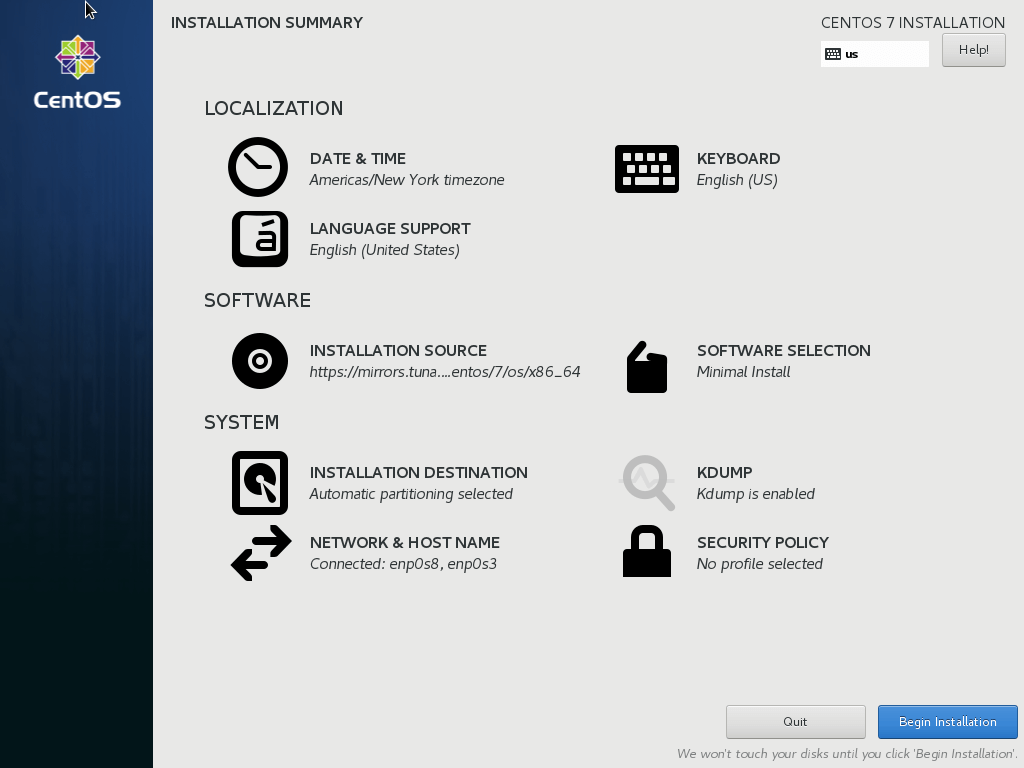
完成各项安装配置
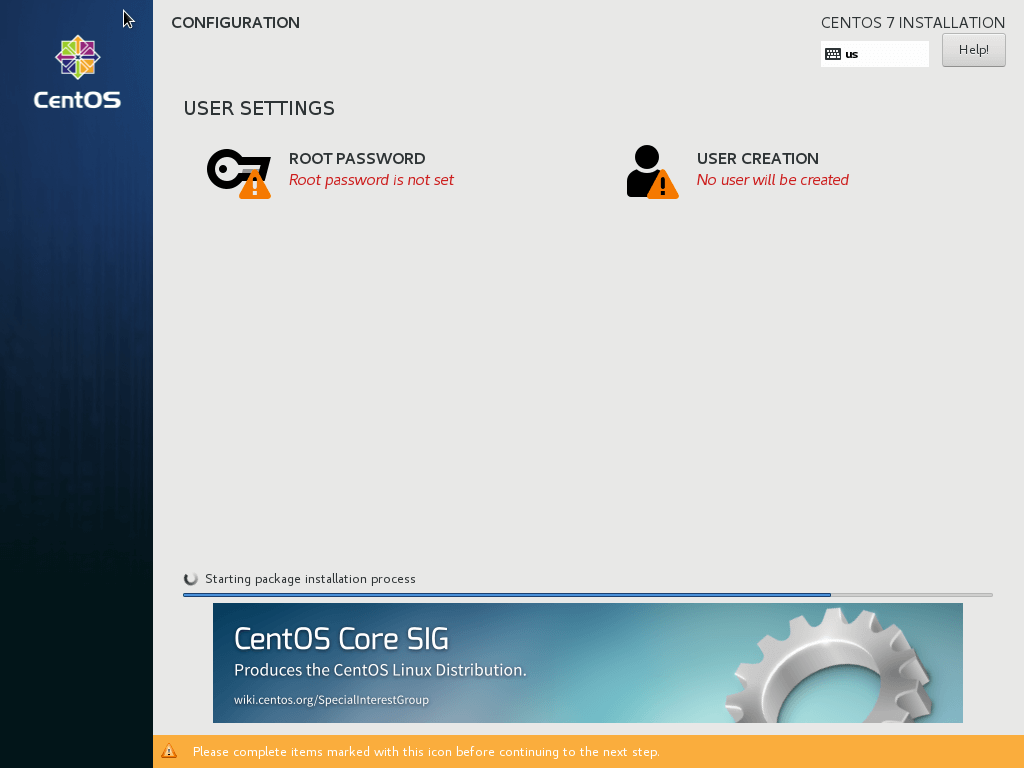
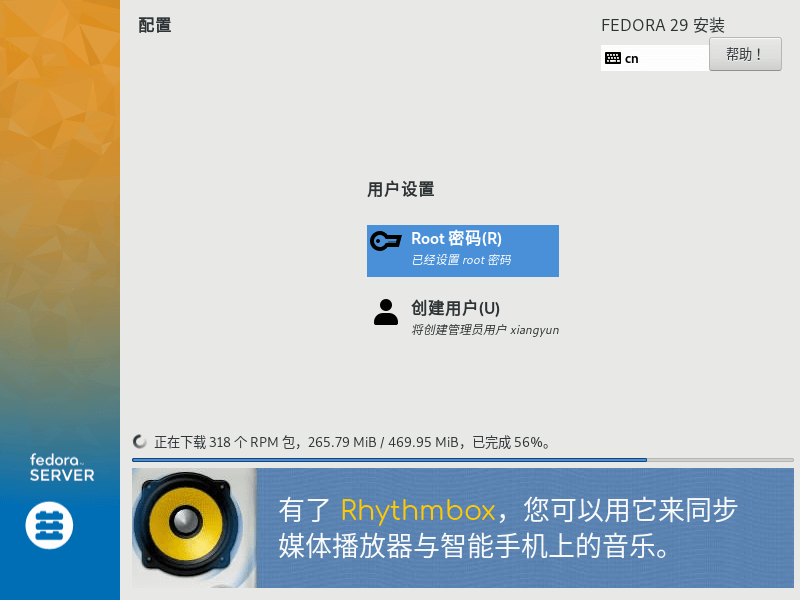
需要创建用户
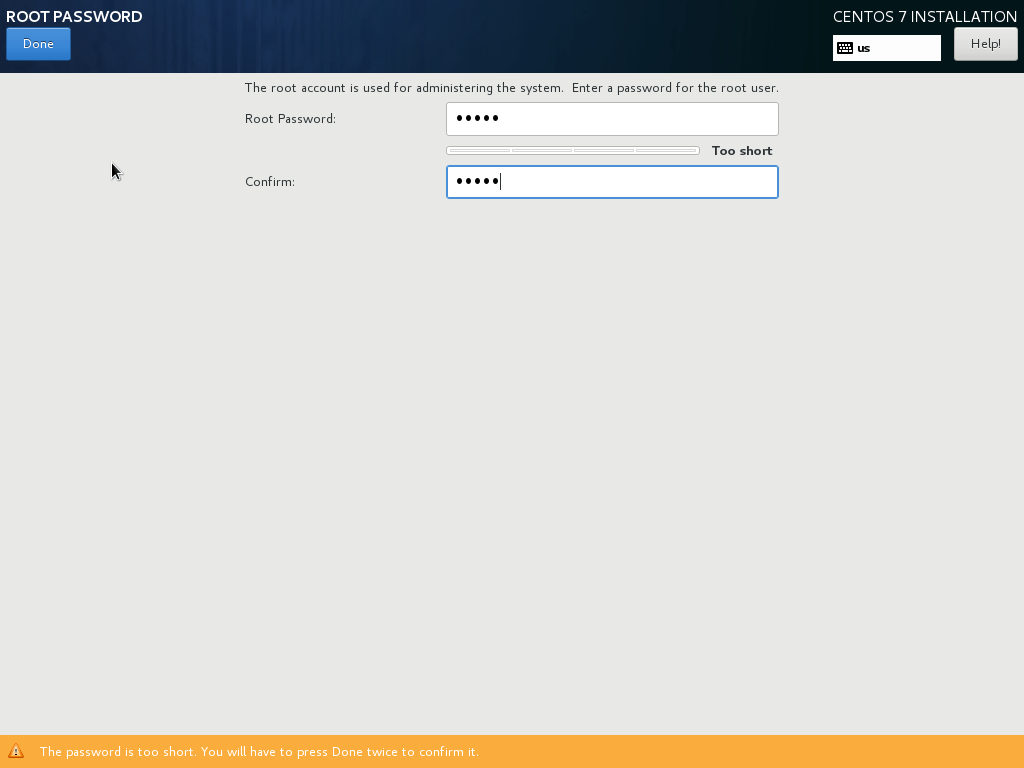
设置 Root 账户登陆密码
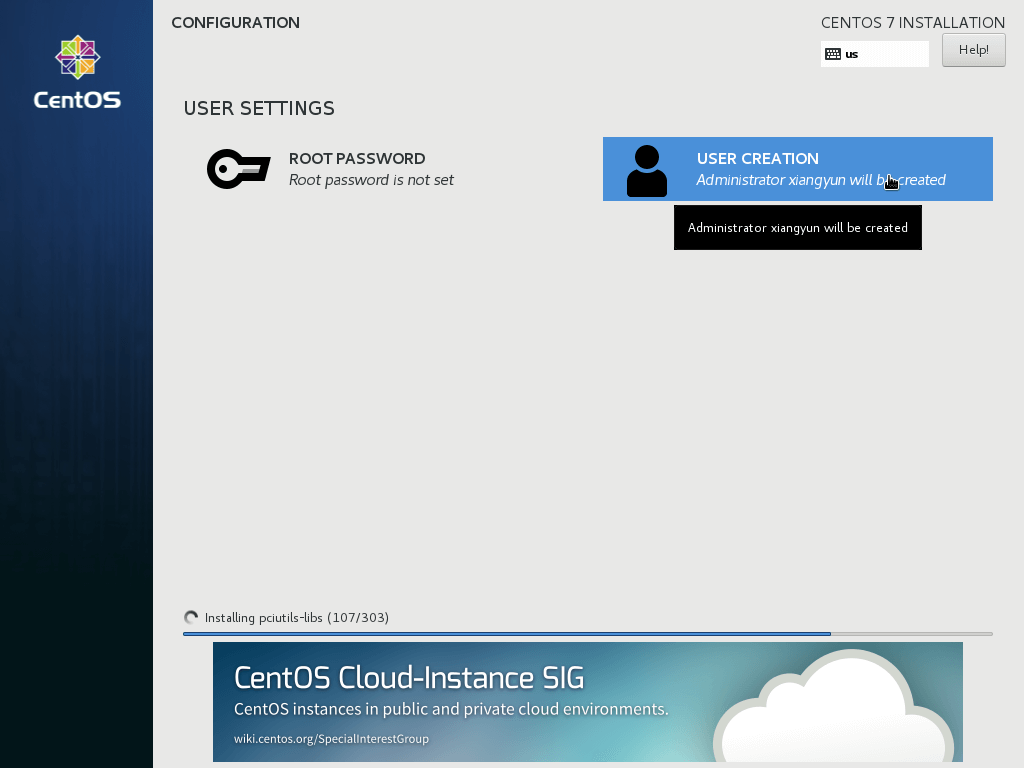
创建普通账户
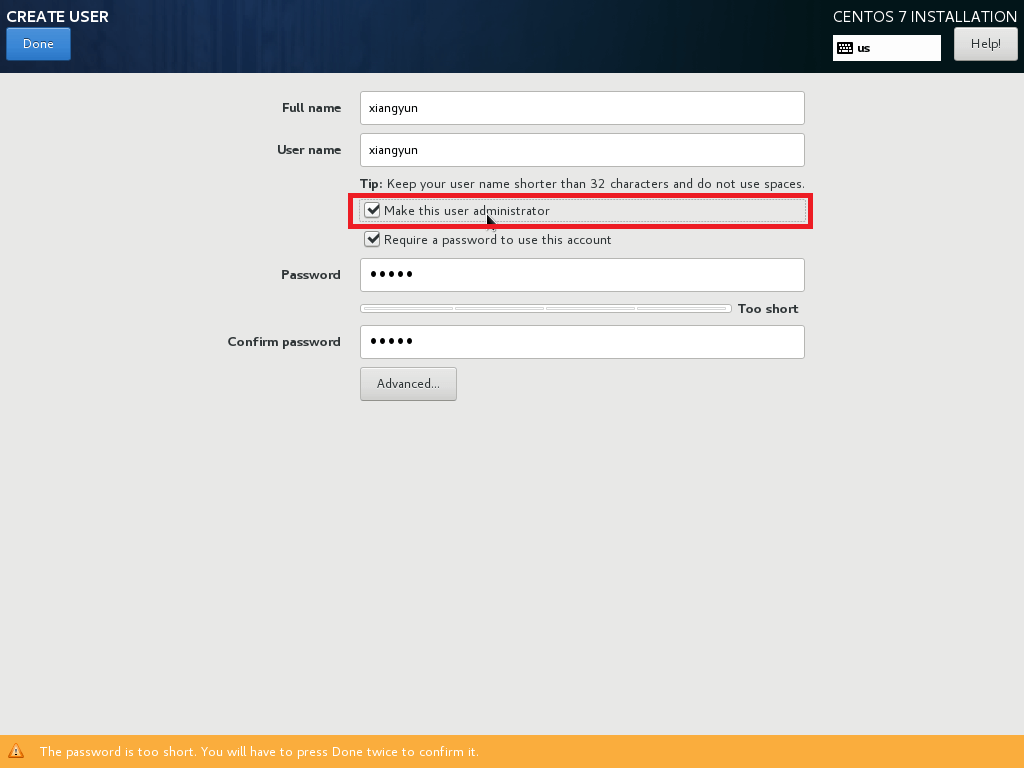
将该用户设置为管理员权限
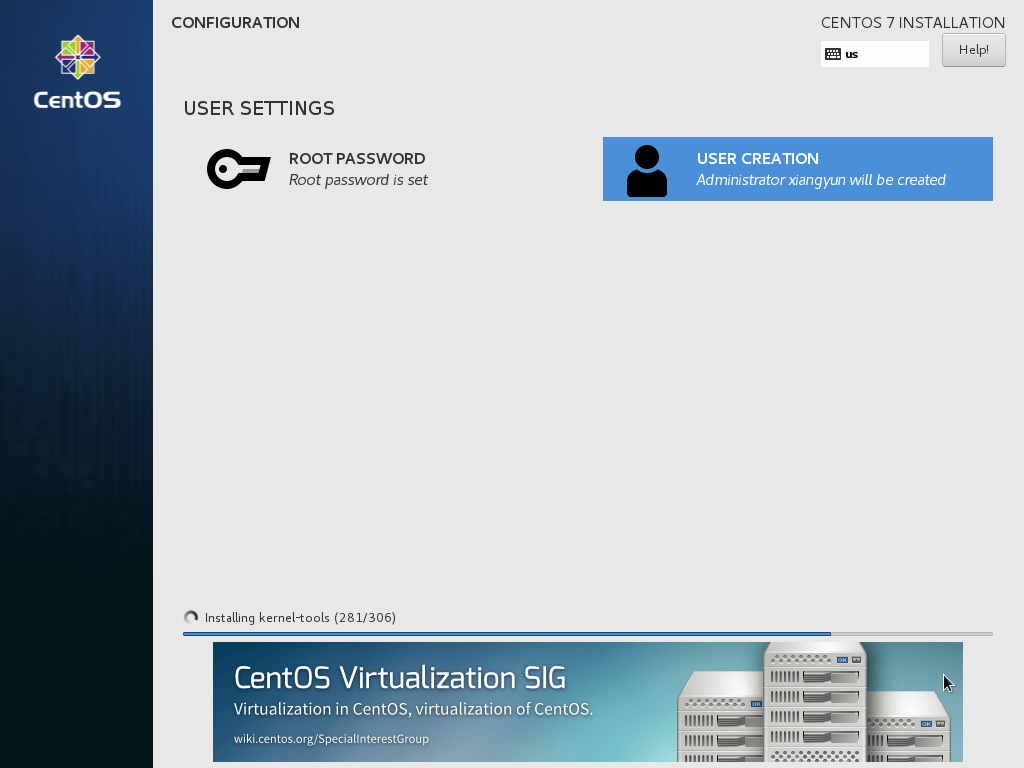
完成用户账户创建
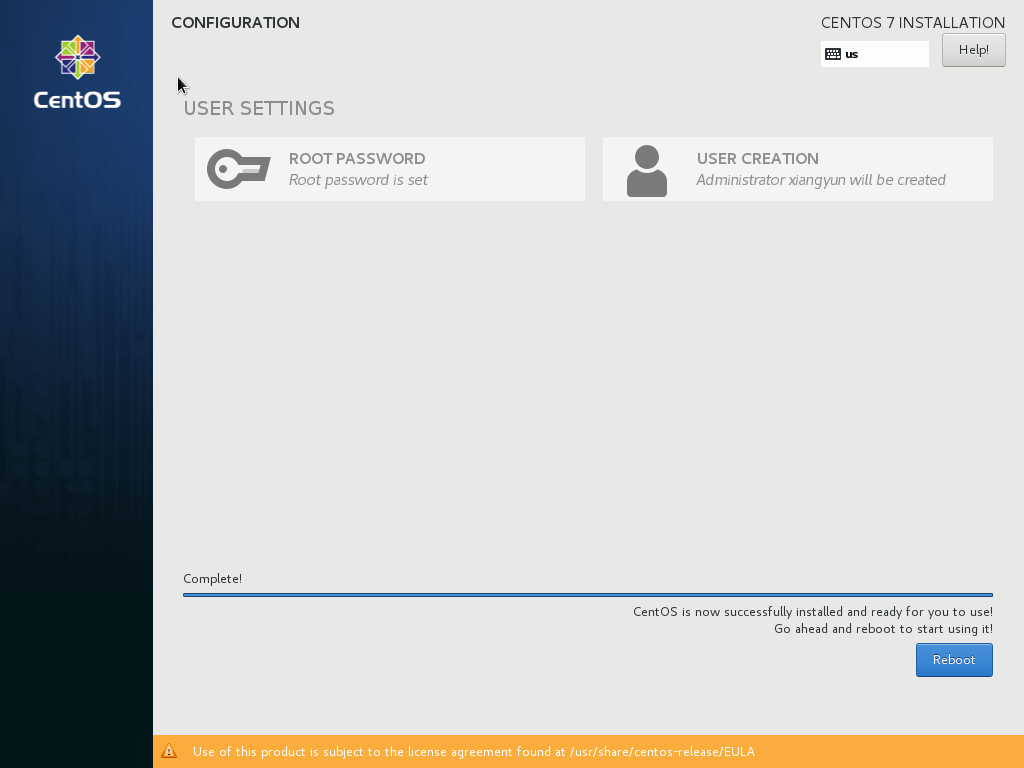
等待安装,直到完成
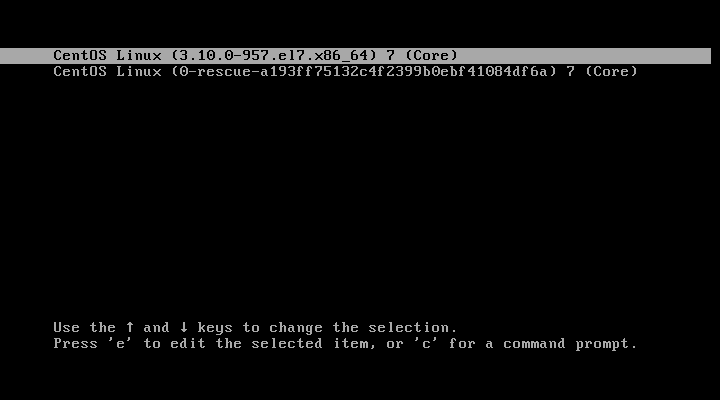
重启,选择第一项进入系统
配置网络
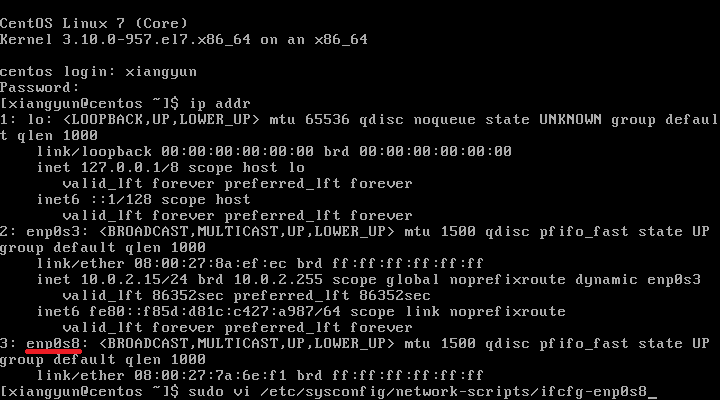
获取 IP 地址
ONBOOT=no 设置为 ONBOOT=yes
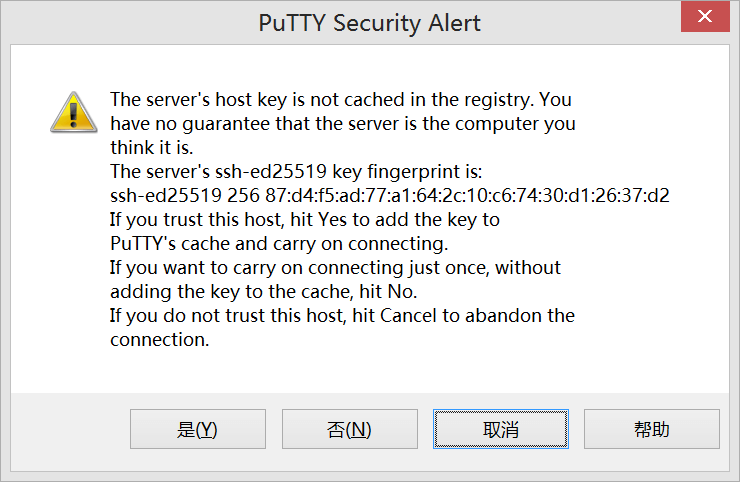
PuTTY 登陆远程虚拟机
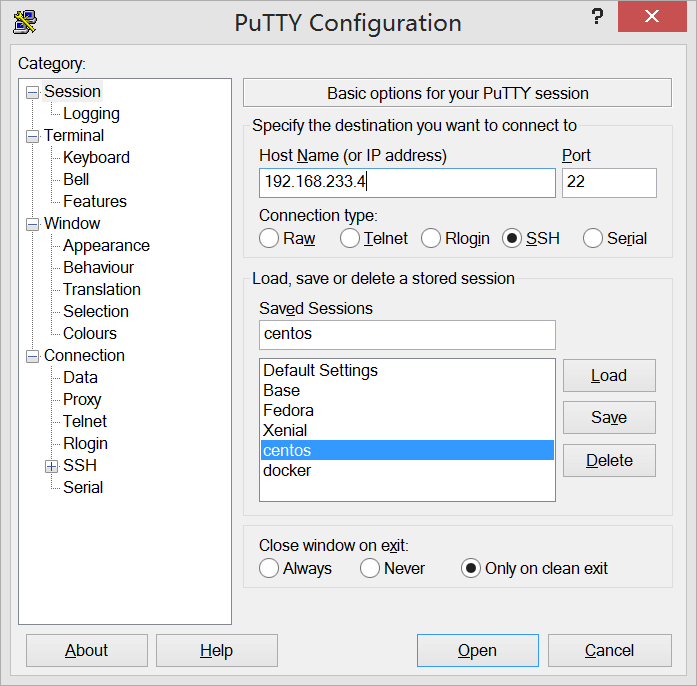
将获得的 IP 输入 PuTTY
第一次连接虚拟机中的操作系统, PuTTY 会有安全提示,选择是,登陆进去
安装 OpenSUSE
开机进入安装界面后,选择时区
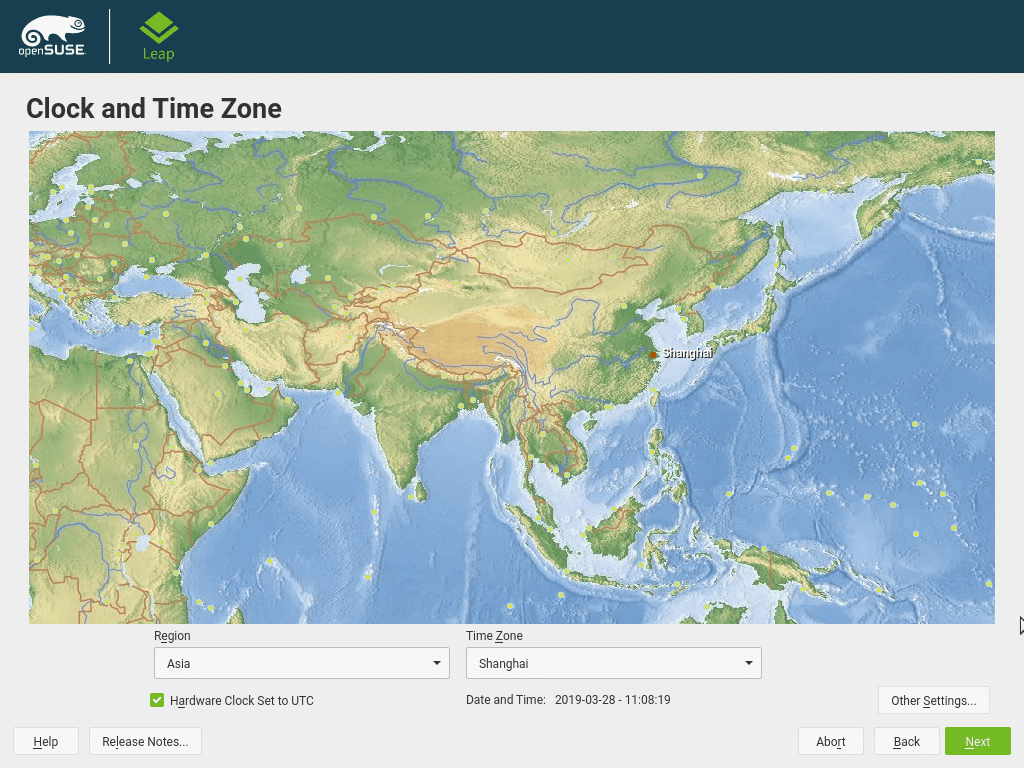
图 1: openSUSE 选择时区
选择安装服务器版本
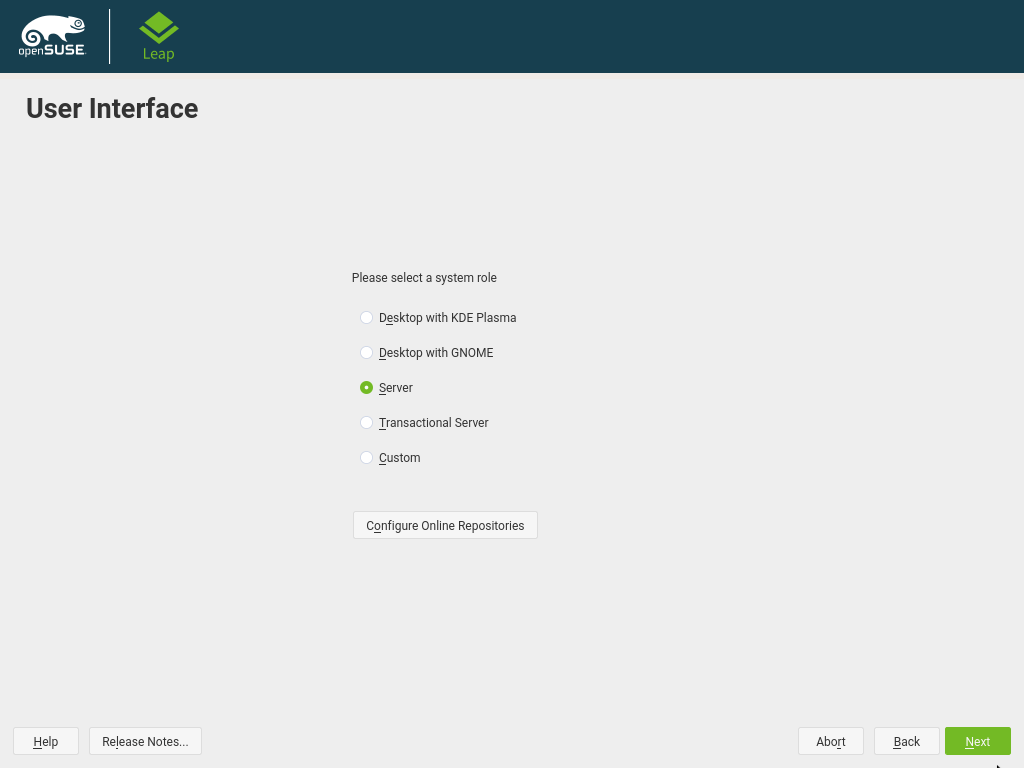
图 2: openSUSE 服务器版本
即将安装的软件
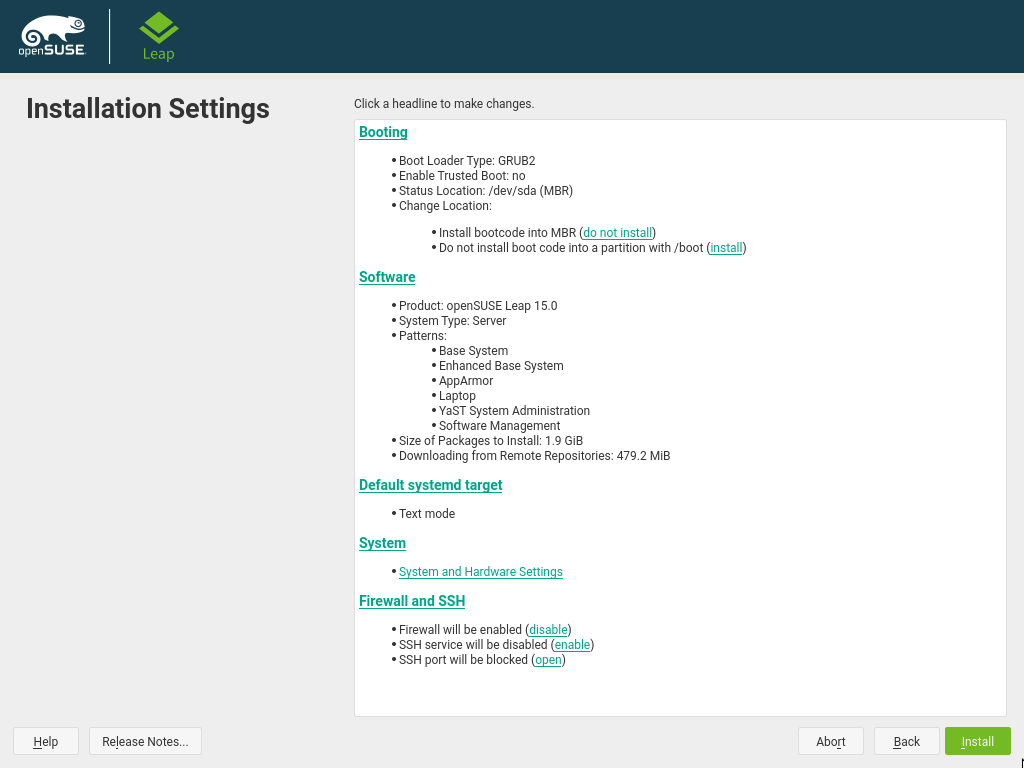
图 3: openSUSE 选择安装软件
创建管理员用户账户
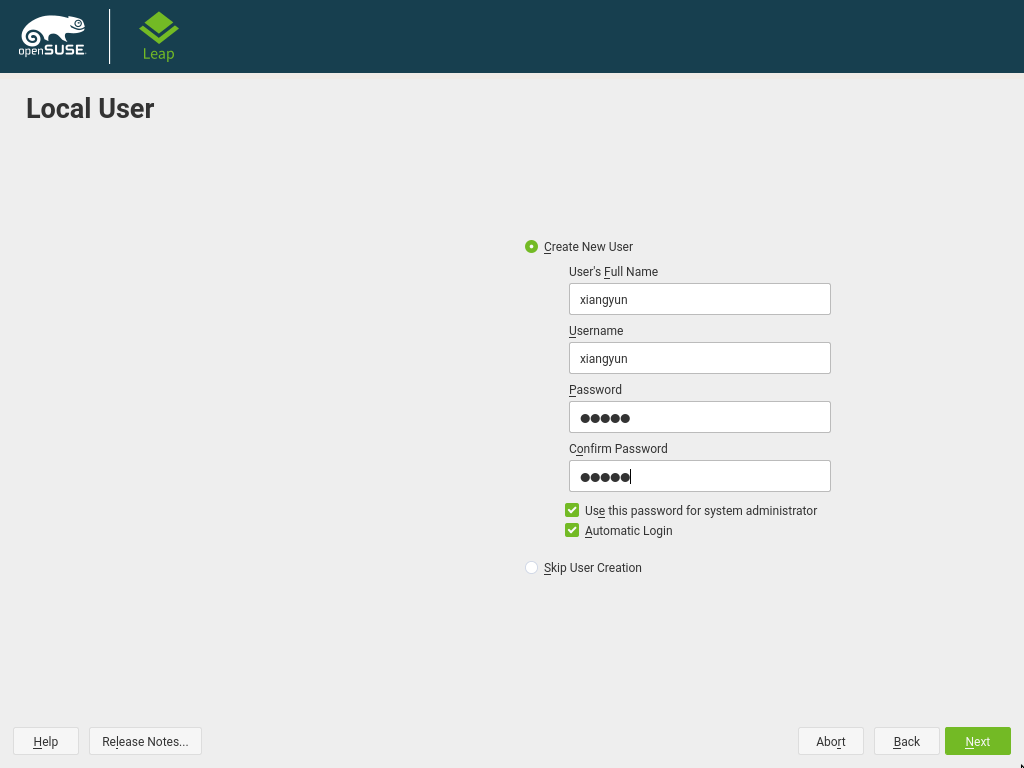
图 4: openSUSE 用户账户
安装 Ubuntu
开机进入安装界面后,首先选择安装过程中使用的语言,这里选择英语
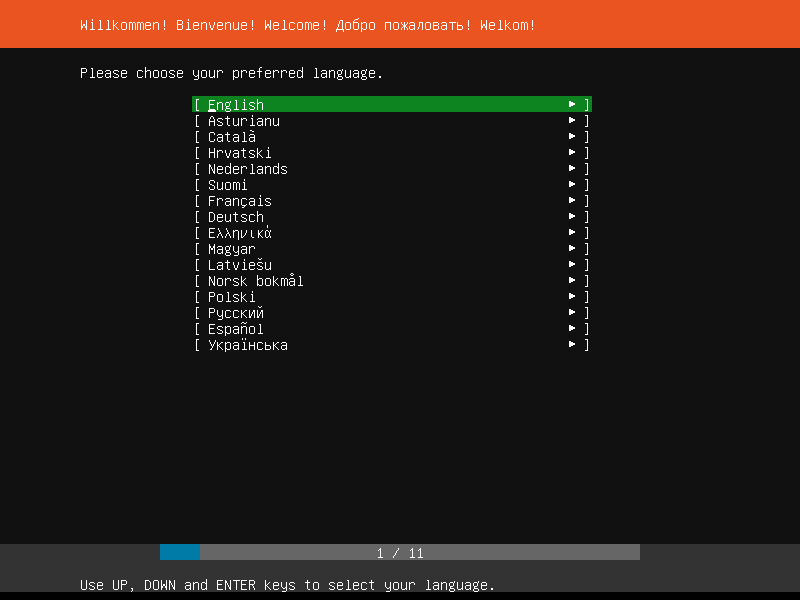
选择语言
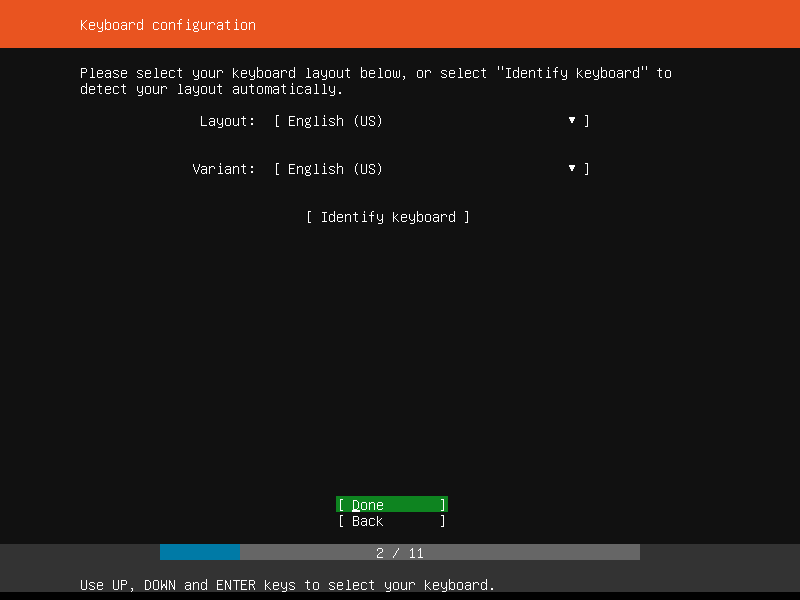
选择键盘布局
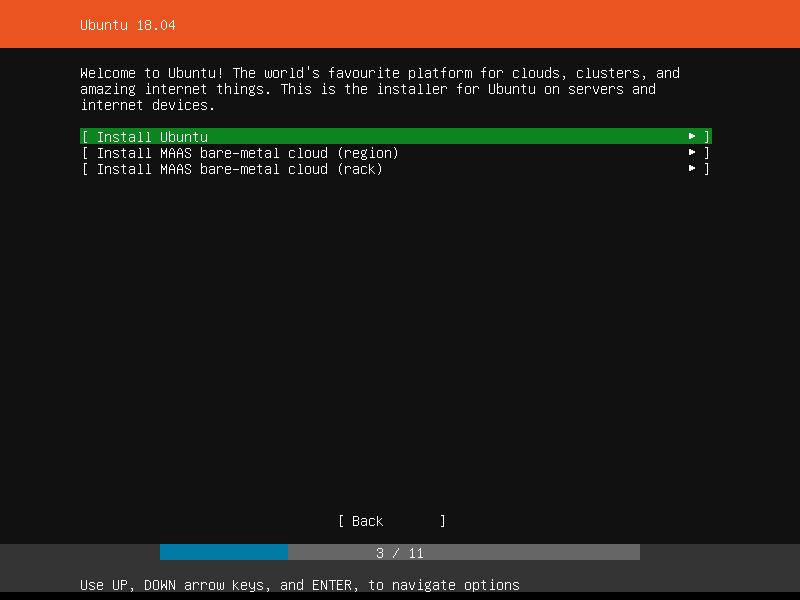
安装 Ubuntu
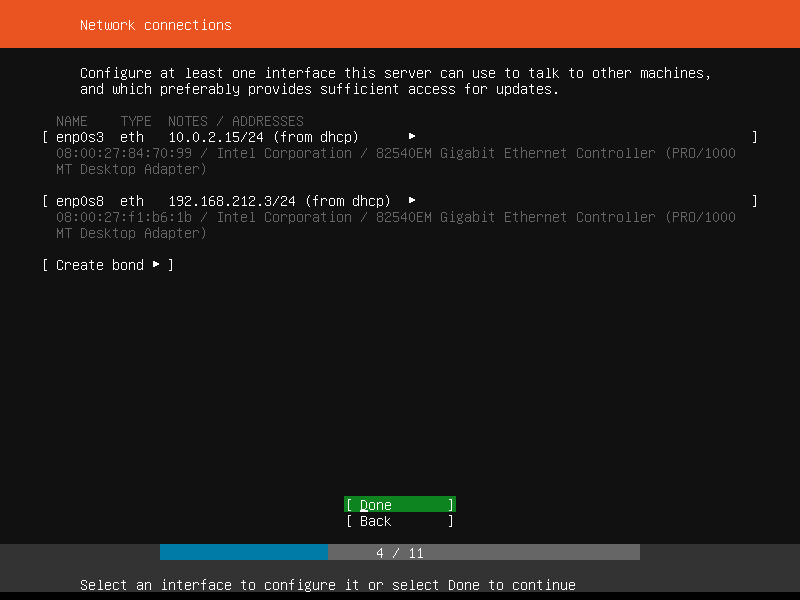
配置网络连接
是否配置代理,选择否
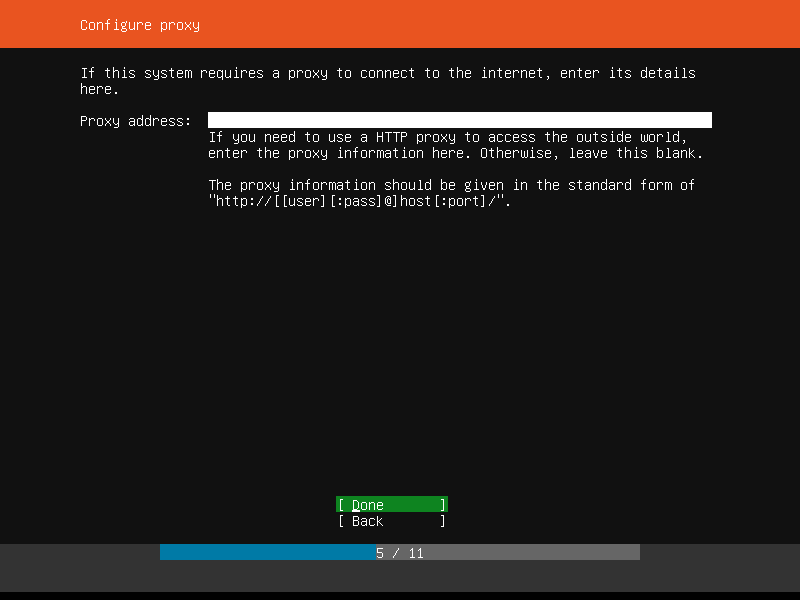
配置代理
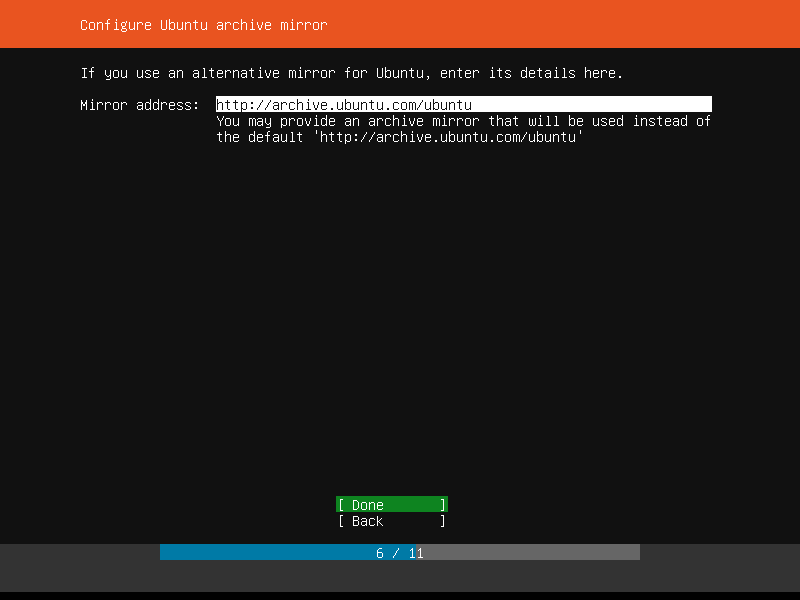
配置远程镜像位置
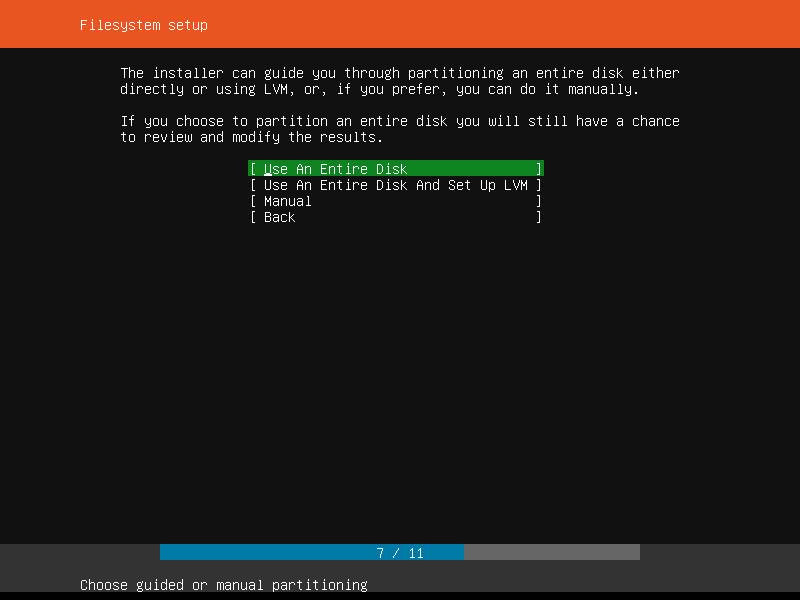
文件系统设置
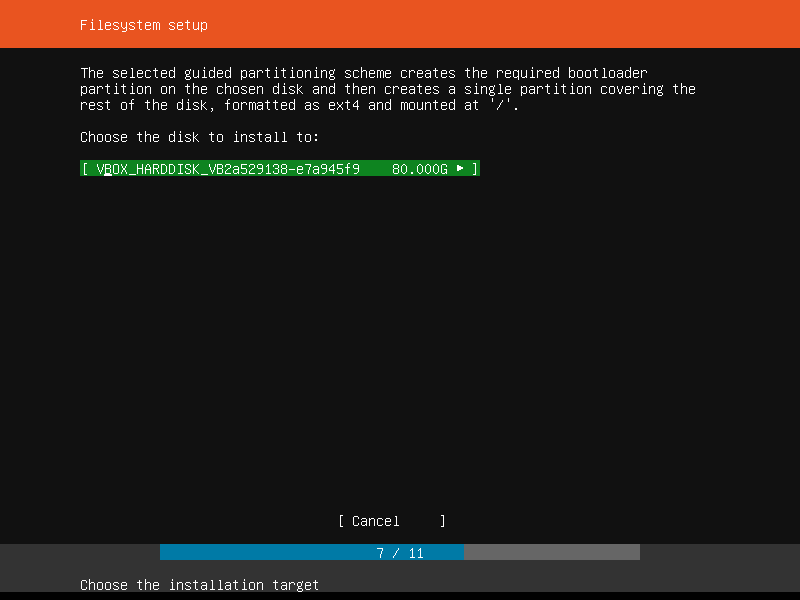
VBox 指定的磁盘
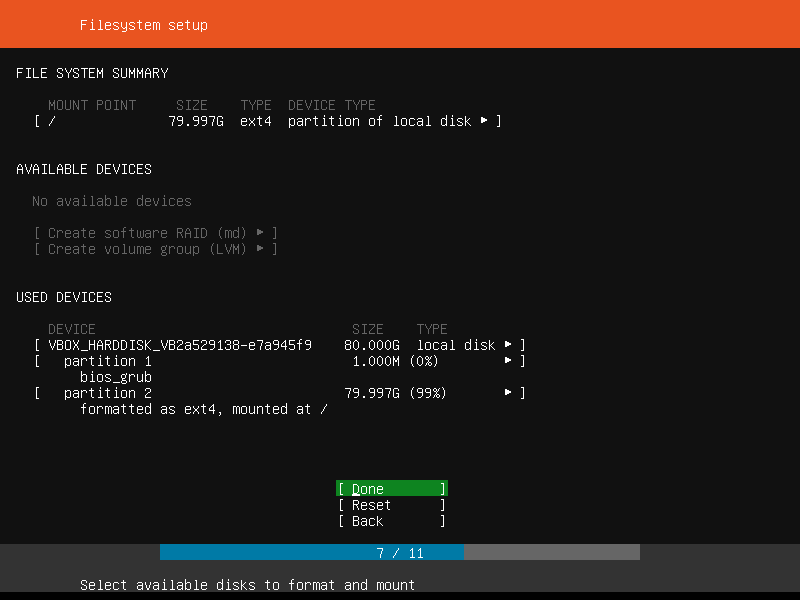
确认磁盘的设置
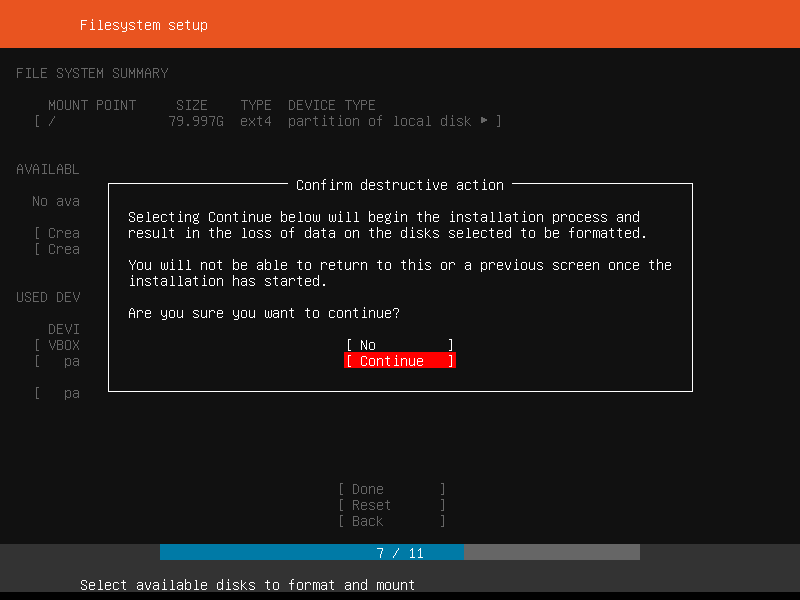
再次确认磁盘的设置,一旦确认就会开始格式化磁盘,不可逆转
磁盘设置
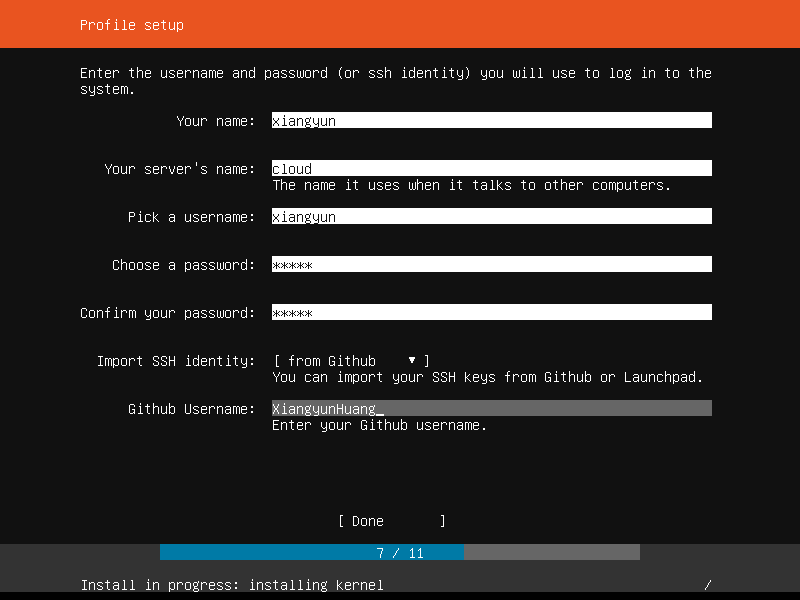
用户管理员账户配置
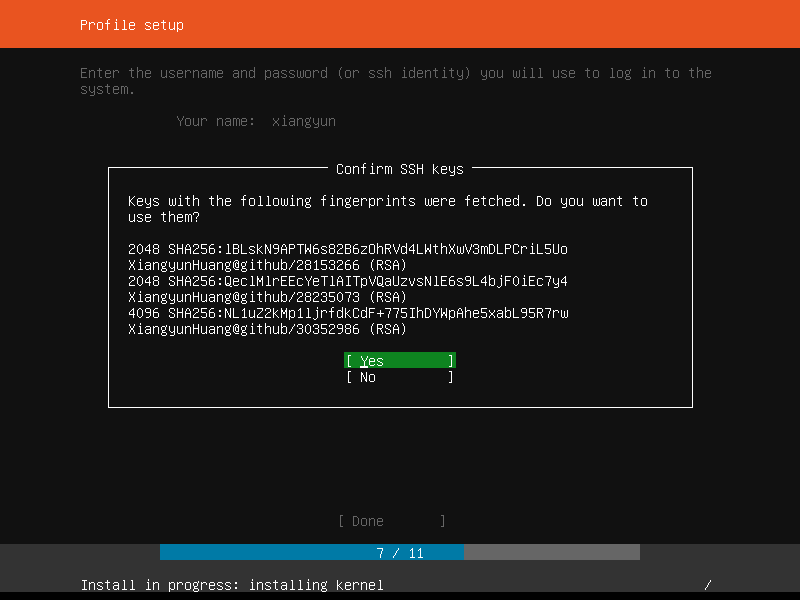
导入 SSH 密钥
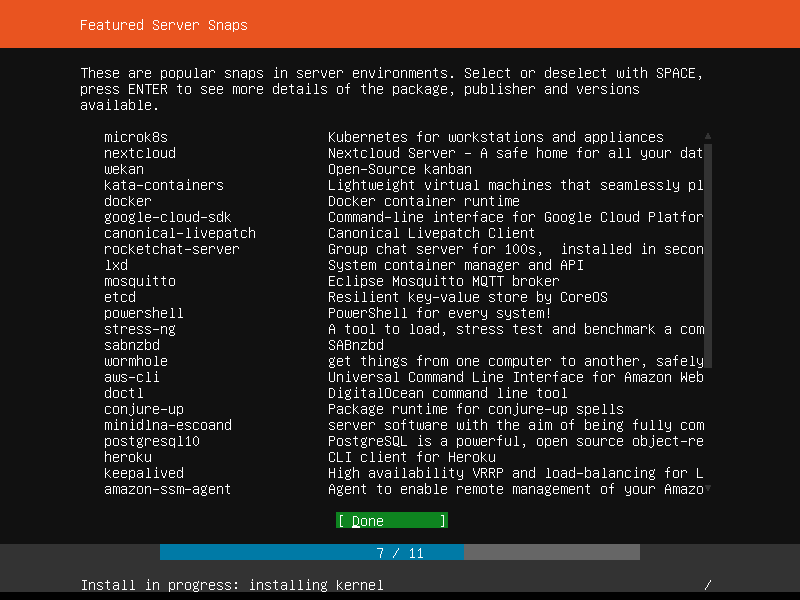
服务器配置
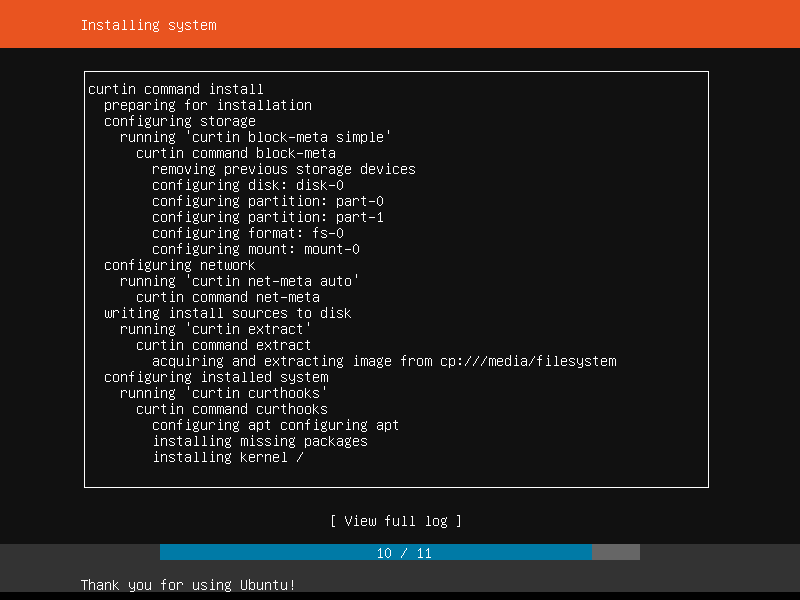
等待安装系统
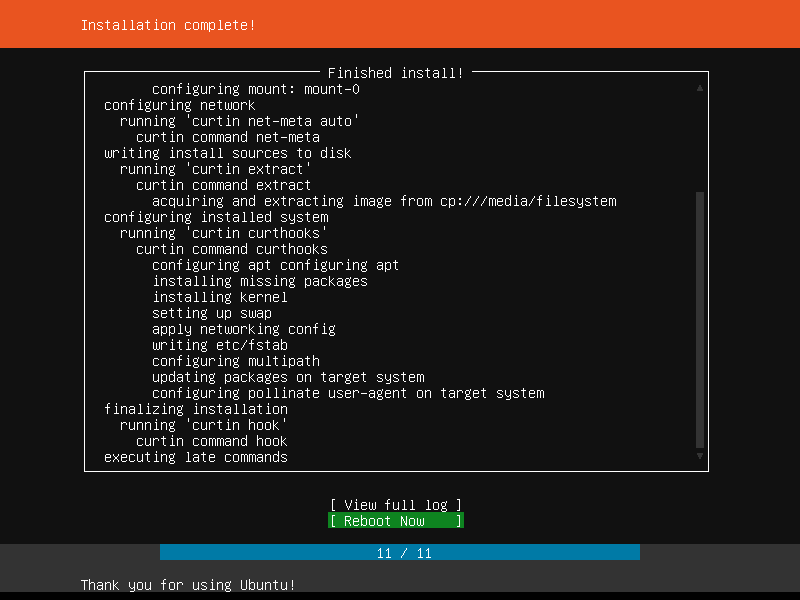
系统安装完成